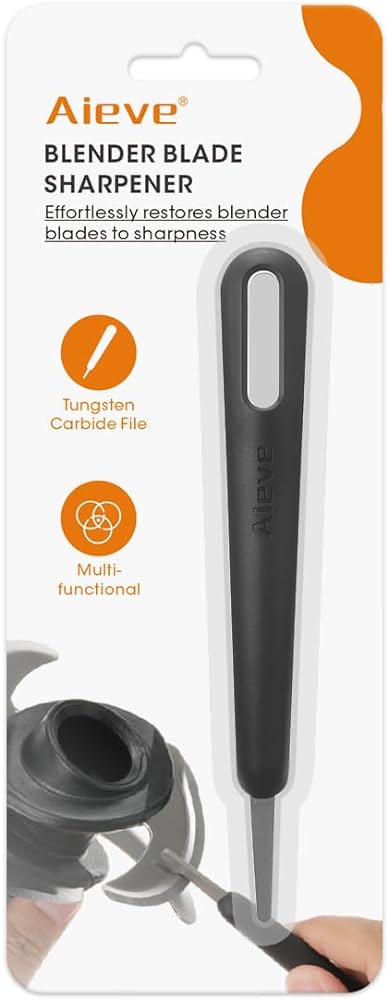
How To Sharpen Blender Blades At Home: Quick & Safe Tips
To sharpen blender blades at home, detach them from the blender and use a sharpening stone or rod. Always handle the blades with care to avoid injury.
Maintaining sharp blades in your blender ensures efficient blending and extends the lifespan of your appliance. A set of dull blades can struggle to process harder ingredients, leading to uneven textures in your blends and potentially damaging the motor. Home cooks looking to keep their equipment in top shape will find sharpening their blender blades a simple yet effective kitchen task.
It not only enhances performance but also contributes to the safety of your blending process. All you need are a few basic tools and a steady hand to restore your blender’s cutting edge. Before you start, unplug the blender for safety and clean the blades to remove any residue, ensuring a smooth sharpening process.
Safety First: Preparing To Sharpen Blender Blades
Blender blades can lose their sharp edge over time. A dull blade can mean less efficient blending. To regain that razor-sharp performance from your blender, learning how to sharpen blender blades at home is key. But before we dive into the sharpening process, let’s talk about safety. Preparing properly ensures that sharpening your blender blades won’t lead to accidents. Follow these steps for a safe and successful experience.
Gathering Necessary Tools
Before starting, it’s important to collect the right tools for sharpening your blender blades:
- Screwdriver: To remove the blade assembly.
- Towel: To dry the blades after cleaning.
- Toothbrush or small brush: For cleaning debris off the blades.
- Sharpening stone or rod: The main tool to sharpen your blades with.
- Cloth: To hold the blade safely while sharpening.
- White vinegar: An optional cleaner for your blades.
Protective Measures And Workspace Set-up
Creating a safe environment is crucial for sharpening blender blades:
| Step | Action |
|---|---|
| 1 | Disconnect the blender from power. |
| 2 | Remove the blade assembly using a screwdriver. |
| 3 | Clean the blades with a brush and vinegar solution. |
| 4 | Dry the blades thoroughly. |
| 5 | Set up a stable workspace with adequate light. |
| 6 | Wear safety gloves to prevent cuts. |
Choose a flat, non-slip surface for your workspace. Never hold the blade in your hand while sharpening. Clamp it down or lay it flat on a cloth for stability. Always move the sharpener against the blade’s edge, away from your body. Take these precautions to avoid injuries and achieve a successfully sharpened blade for your blender.

Credit: www.amazon.com
Identifying When Your Blades Need Sharpening
Blenders are key for smoothies, soups, and sauces. But sometimes, they get dull. You need to know when to sharpen the blades.
Signs Of Blunt Blades
Blender blades should slice with ease. Blunt blades struggle. Look out for these signs:
- Larger than usual pieces in blends
- Longer blending times
- Weird noises or smells during blending
- Food processing seems uneven
Performance Checks For Blender Efficiency
To test your blade’s sharpness, do these checks:
- Blend plain water to listen for consistent motor sounds.
- Puree soft fruits to check for uniform texture.
- Crush ice to ensure blades can handle tough substances.
If the blender performs poorly, sharpen the blades at home.
The Disassembly: Accessing The Blades
Keeping your blender sharp extends its life and improves performance. A dull blender blade can hinder your appliance’s efficiency. But don’t worry, sharpening blender blades is a task you can do at home with ease. First, the blades must be accessible. This part of the maintenance process is crucial. Let’s dive into the steps for disassembling your blender and getting to those blades.
Step-by-step Guide To Removing Blender Parts
Removing the blender parts for blade access requires care. Follow this guide:
- Unplug the blender for safety.
- Remove the blender jar from the base.
- Hold the blade from the bottom and twist off the retaining nut.
- Extract the blade and sealing gasket.
- Lift out any other remaining parts such as washers.
Cleaning The Blades Before Sharpening
Cleaning is vital for spotting any nicks or corrosion.
- Soak blades in soapy water to loosen particles.
- Use a soft brush to scrub the blades.
- Rinse under running water.
- Dry with a soft cloth to prevent rust.
With clean and disassembled parts, you’re now ready to sharpen the blades effectively. Taking the time to disassemble and clean those blades will make sharpening them much easier and safer. Stay tuned for the next section, where we’ll go over the methods to sharpen those blades right at home!
Sharpening Techniques: Restoring The Edge
Blender blades can get dull after many smoothies and sauces. A sharp blade makes blending quick and efficient. You don’t need a pro to get that razor-sharp edge back. These at-home sharpening techniques will help you slice through fruits and veggies with ease. Keep reading to learn how to give your blender blades new life.
Manual Sharpening With A Sharpening Stone
Sharpening your blender blades manually is straightforward and cost-effective. You just need a sharpening stone, also known as a whetstone.
- Unscrew the blades from the blender.
- Clean them with soap and water.
- Dry them thoroughly.
- Hold the blade at a 20-degree angle against the stone.
- Glide the blade across the stone in swift motions.
- Repeat until the blade is sharp.
Always move the blade away from your body to prevent injury. Use gloves for extra protection.
Using A Rotary Tool For Precision
If you want more control when sharpening blender blades, use a rotary tool.
- Choose a grinding stone attachment.
- Secure your blade.
- Turn on the rotary tool to a medium speed setting.
- Apply gentle pressure as you move the tool along the blade’s edge.
- Keep a steady hand for even sharpening.
Wear safety goggles to protect your eyes from metal filings. Looking for a precise edge? The rotary tool delivers.
Reassembling Your Blender Correctly
After sharpening your blender blades, putting the blender back together is a crucial step. Proper reassembly ensures everything runs smoothly and safely. Follow these steps to guarantee your blender is in top-notch condition for your next smoothie or sauce.
Ensuring The Blades Are Secure
Confirm the blade’s alignment with the base and that it sits flat. Start by hand-tightening the blades onto the base. Next, use a wrench to secure them firmly in place, but be careful not to over-tighten, as it could cause damage. Here’s what to keep in mind:
- Blades must sit evenly on the base.
- Use appropriate tools to tighten the blade assembly.
- Check for any wobble or looseness; re-tighten if necessary.
Testing The Blender After Reassembly
Testing your blender after reassembly is a critical safety measure. Start by plugging in the blender and running it on the lowest setting. Listen for any unusual noises. If it sounds normal, gradually increase the speed. Observe the following during the test:
- Unusual vibrations or sounds could indicate a problem.
- Ensure the base is stable and the lid is securely fastened.
- If everything seems normal, try blending a small amount of water or soft items.
Through these steps, you can ensure your blender is ready for all mixing operations. Proper maintenance extends the life of your appliance and delivers better results in the kitchen.

Credit: www.walmart.com
Maintenance Tips: Keeping Blades Sharp Longer
Blenders make life easier in the kitchen, but dull blades can quickly turn this convenience into a hassle. Understanding how to maintain sharp blades will extend the life of your blender and keep it operating at peak performance. Follow these essential tips to ensure your blender stays efficient and effective over time.
Regular Cleaning Dos And Don’ts
Regular cleaning is crucial for blender blade maintenance. Here’s what you should and should not do:
- Do unplug the blender before cleaning.
- Do dismantle the blades carefully, if possible, to clean every nook.
- Do use warm, soapy water to loosen residue.
- Do dry blades immediately to prevent rusting.
- Don’t use abrasive sponges that can cause scratches.
- Don’t soak blades for too long, as this could damage the bearings.
- Don’t ignore the gasket seal, clean it to prevent buildup.
Proper Usage To Avoid Dullness
To keep your blender’s blades sharp, consider how you use your appliance:
| Proper Usage | Reason |
|---|---|
| Cut ingredients into smaller pieces | Less strain on blades |
| Alternate between pulsing and blending | Reduces prolonged blade exposure to hard foods |
| Avoid blending highly dense or non-food items | Prevents blade damage |
| Use the right speed setting for the food type | Ensures efficient blending without overworking the blades |
Remember, proper usage equals longevity for your blender blades. Always consult your blender’s manual for the best practices specific to your model. By keeping these tips in mind, you’re not just sharpening your blades, you’re boosting your entire blending experience!
:max_bytes(150000):strip_icc()/best-blenders-a7e6931407ee4842a65b6bf43b46f431.jpg)
Credit: www.eatingwell.com
Frequently Asked Questions On How To Sharpen Blender Blades At Home
Can You Sharpen Blender Blades At Home?
Yes, you can easily sharpen blender blades at home using a few simple tools such as a sharpening stone, steel wool, or even a nail file for quick touch-ups.
What Is The Safest Way To Sharpen Blender Blades?
The safest way to sharpen blender blades is to first unplug the blender, remove the blades, and then use a sharpening stone or rod while wearing protective gloves.
How Often Should I Sharpen My Blender Blades?
Typically, you should sharpen your blender blades every few months or when you notice a decline in performance. However, usage frequency and blending materials affect sharpening intervals.
Do Dull Blender Blades Affect Blending Quality?
Yes, dull blender blades can lead to inconsistent blending and longer processing times. Keeping blades sharp ensures efficient and smooth operation.
Conclusion
Sharpening your blender blades needn’t be a daunting task. With the right tools and techniques, you can restore their cutting efficiency from the comfort of home. Embrace these simple steps for a smoother blend every time. Always prioritize safety and upkeep to keep your appliance at its best.
Happy blending!